

Manage team members with granular permissions
You can limit the access given to any user in your Fillout organization. First, invite them as a member: in Invite members, add their email and choose Member under Invite as. You can also turn on Add user to groups to add them to a group right away.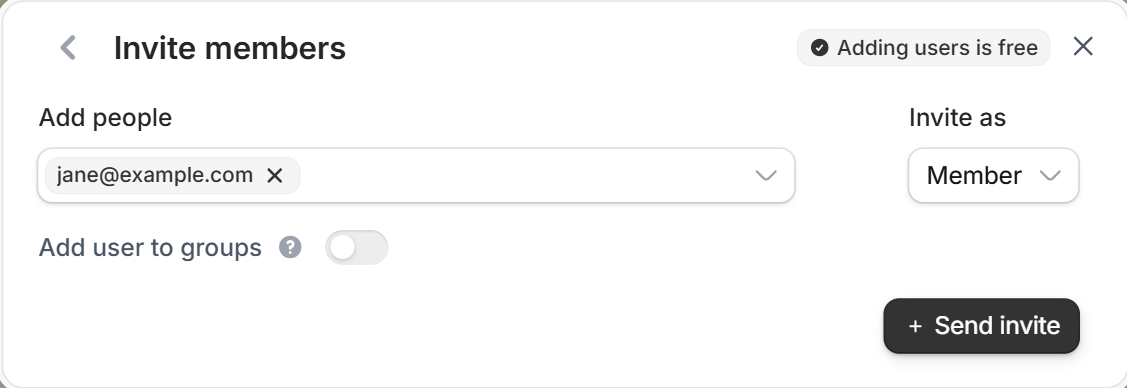
View existing permissions
Click yourorganization name in the upper left corner followed by Settings. Then, click Team members in the left-hand panel. Settings opens on this tab by default, but you may already be on another one.
Admin vs non-admins
Admins can access all workspaces, integrations, and organization settings. Non-admins have limited access based on their assigned workspaces and can’t change organization settings. The account owner is the first user created on the account and has admin privileges by default.
Who can change workspace access
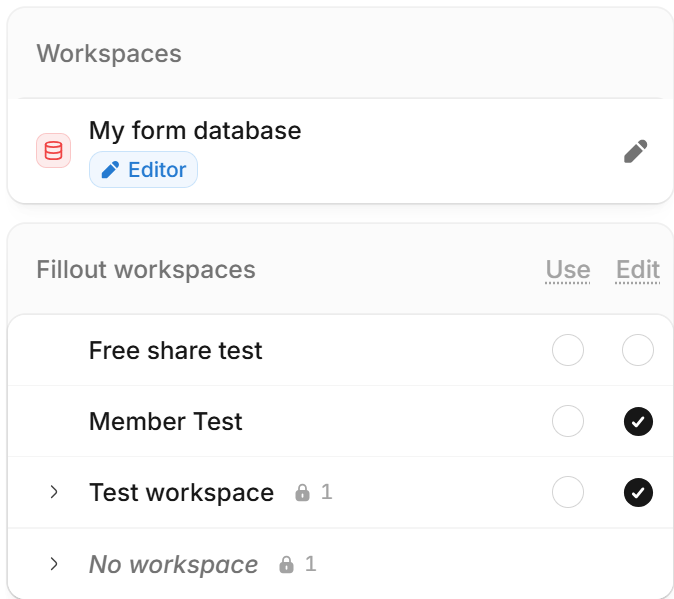
Only admins can remove someone’s access to a workspace. Members can add people to workspaces they have access to, but they can’t give edit access to a workspace where they can only view results. If a member of your organization can’t open a workspace, they don’t have access to it yet. To give them access as an admin:- Go to
Settingsand clickTeam members. - Click the member, then open the
Accesstab. - Under Fillout workspaces, select Use or Edit next to the Fillout workspace. For a Zite workspace under Workspaces, hover over it and click the pencil icon to open its editors page.
- Click
Save.
Access to forms
A form’s access comes from its owner, its Fillout workspace, and the people it’s shared with. Access to a Zite workspace doesn’t give access to forms, even if they save responses to that workspace’s database. To edit a form that saves to a Zite database, you also need edit access to that database. Organization admins can always edit. See Who can edit a form that saves to a database. Testing a form’s integrations or previewing its workflows also needs edit access to the form. Members who can only view results get Not authorized - write access required.Access requests
When someone opens a workspace or form they don’t have access to, they can request access. The request is emailed to the workspace’s owner and editors, up to three people. ClickManage access in the email to open the workspace’s Users page with the invite already filled in.
To give someone access to a Fillout workspace, open the workspace and click Share in the upper right. Enter their email under Add people, or click Create link to invite coworkers with a link.
When you add someone to a workspace, app, or form, they get an email with an Open it button.
Limit access to integrations (connected accounts)
To limit which team members can access which integrations, log in as an admin. From your dashboard, click yourorganization name in the upper left corner followed by Settings, then Integrations. More info here.
Users in the allowed workspaces can create new forms and edit existing ones that use that integration. Users without access won’t be able to use the integration.
Related articles
Add form collaborators
View results and edit forms with free seats.
Organizations
Create organizations for different companies with the same email.
Workspaces
Organize forms in folders and control user access.