Overview
The choice matrix field type can be used to collect data organized in a grid or table, where users need to select one or multiple options per row. Common use cases include:- Selecting dates and corresponding slots or appointment times
- Ranking multiple options in a grid on a likert scale (e.g., unlikely to likely)
- Compare several products or features across multiple dimensions (e.g., performance, cost, reliability)
How to put a choice matrix
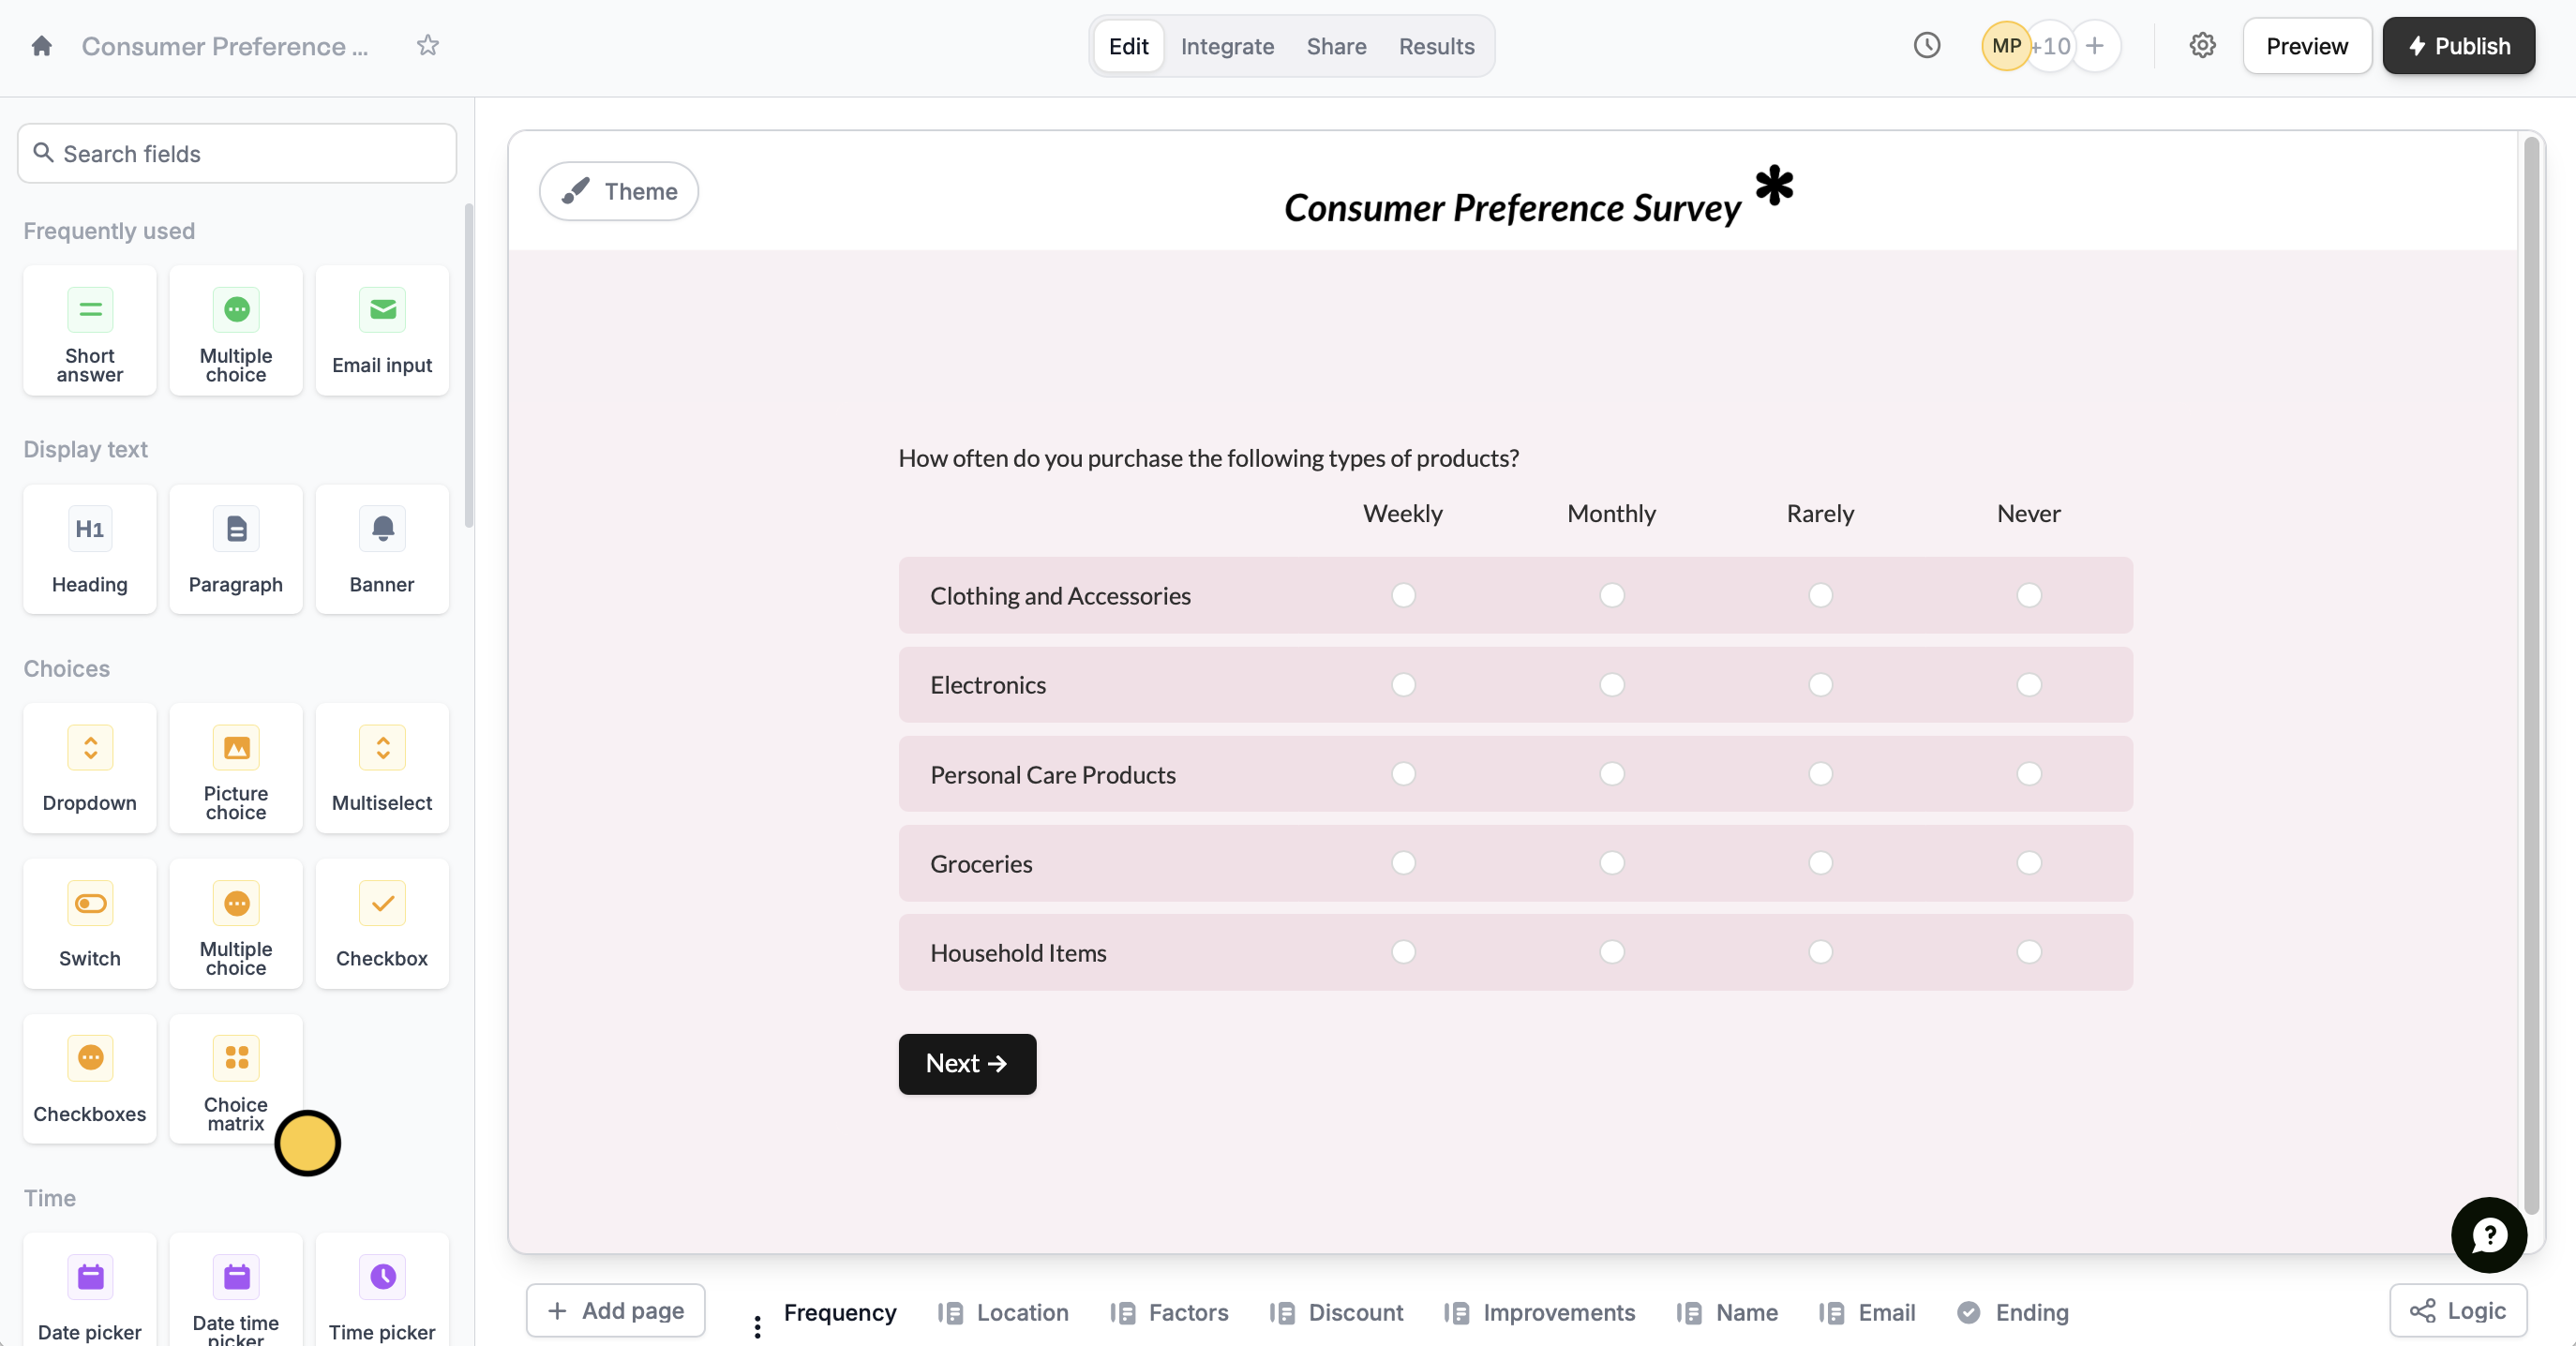
Add titles for the rows and columns
The rows of your matrix will typically define the options or questions you want to have choices chosen for. In the example above, we’ve added item categories for the rows, and frequencies as the columns.
Turn radio buttons into checkboxes (Optional)
You can configure the choice matrix to allow single or multiple selections. Click the choice matrix followed by its , and toggle 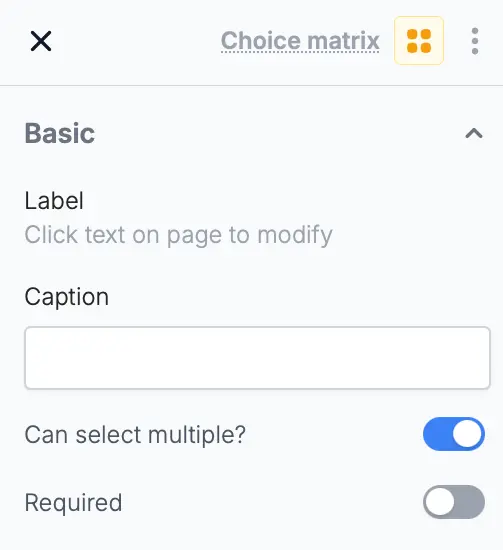
Can select multiple? in the right-hand panel.For single questions that may have multiple answers, use checkboxes, a multi-select or a picture choice field. More info here.
Connect a choice matrix to integrations
When integrating the choice matrix (e.g., with Airtable, Notion, or HubSpot), you can map each row to different fields or properties separately.Select an integration
Click
Integrate in top menu and choose Airtable, Notion or another integration.Add a Choice matrix field
Click
Edit in the top menu. In the left-hand panel under Other, click Choice matrix.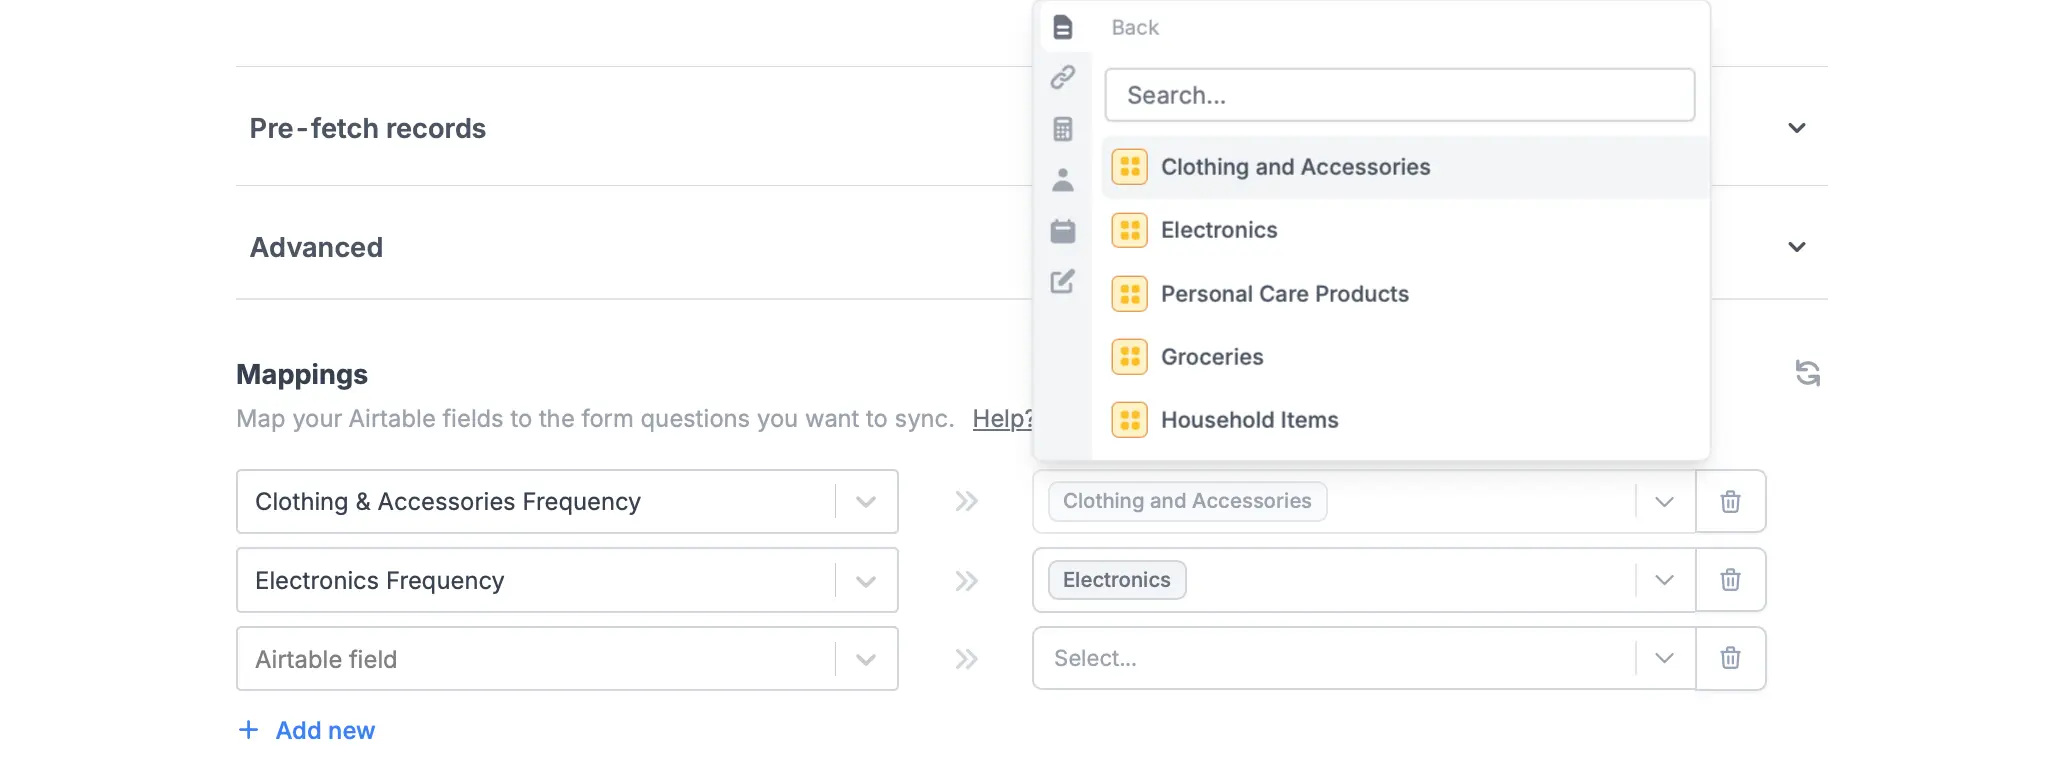
Related articles
Enable multiselect
Create choice questions that support multiple answers.
Add a table
Let respondents enter data in a spreadsheet-like format.