> ## Documentation Index
> Fetch the complete documentation index at: https://fillout.com/help/llms.txt
> Use this file to discover all available pages before exploring further.
# Map Fillout fields to integrations
> Set form fields and values to send to Notion, Airtable, and other integrations.
## Overview
One of the most important parts of connecting to a database or integration is connecting your form fields so they’re actually sent to your database or tool when the form is submitted.
## Automatic field mapping
Fillout automatically pulls in the columns or fields from your database or integration and turns them into form fields. Once you link an integration, those **connected fields appear in the left-hand panel**, ready for you to drag and drop into your form.
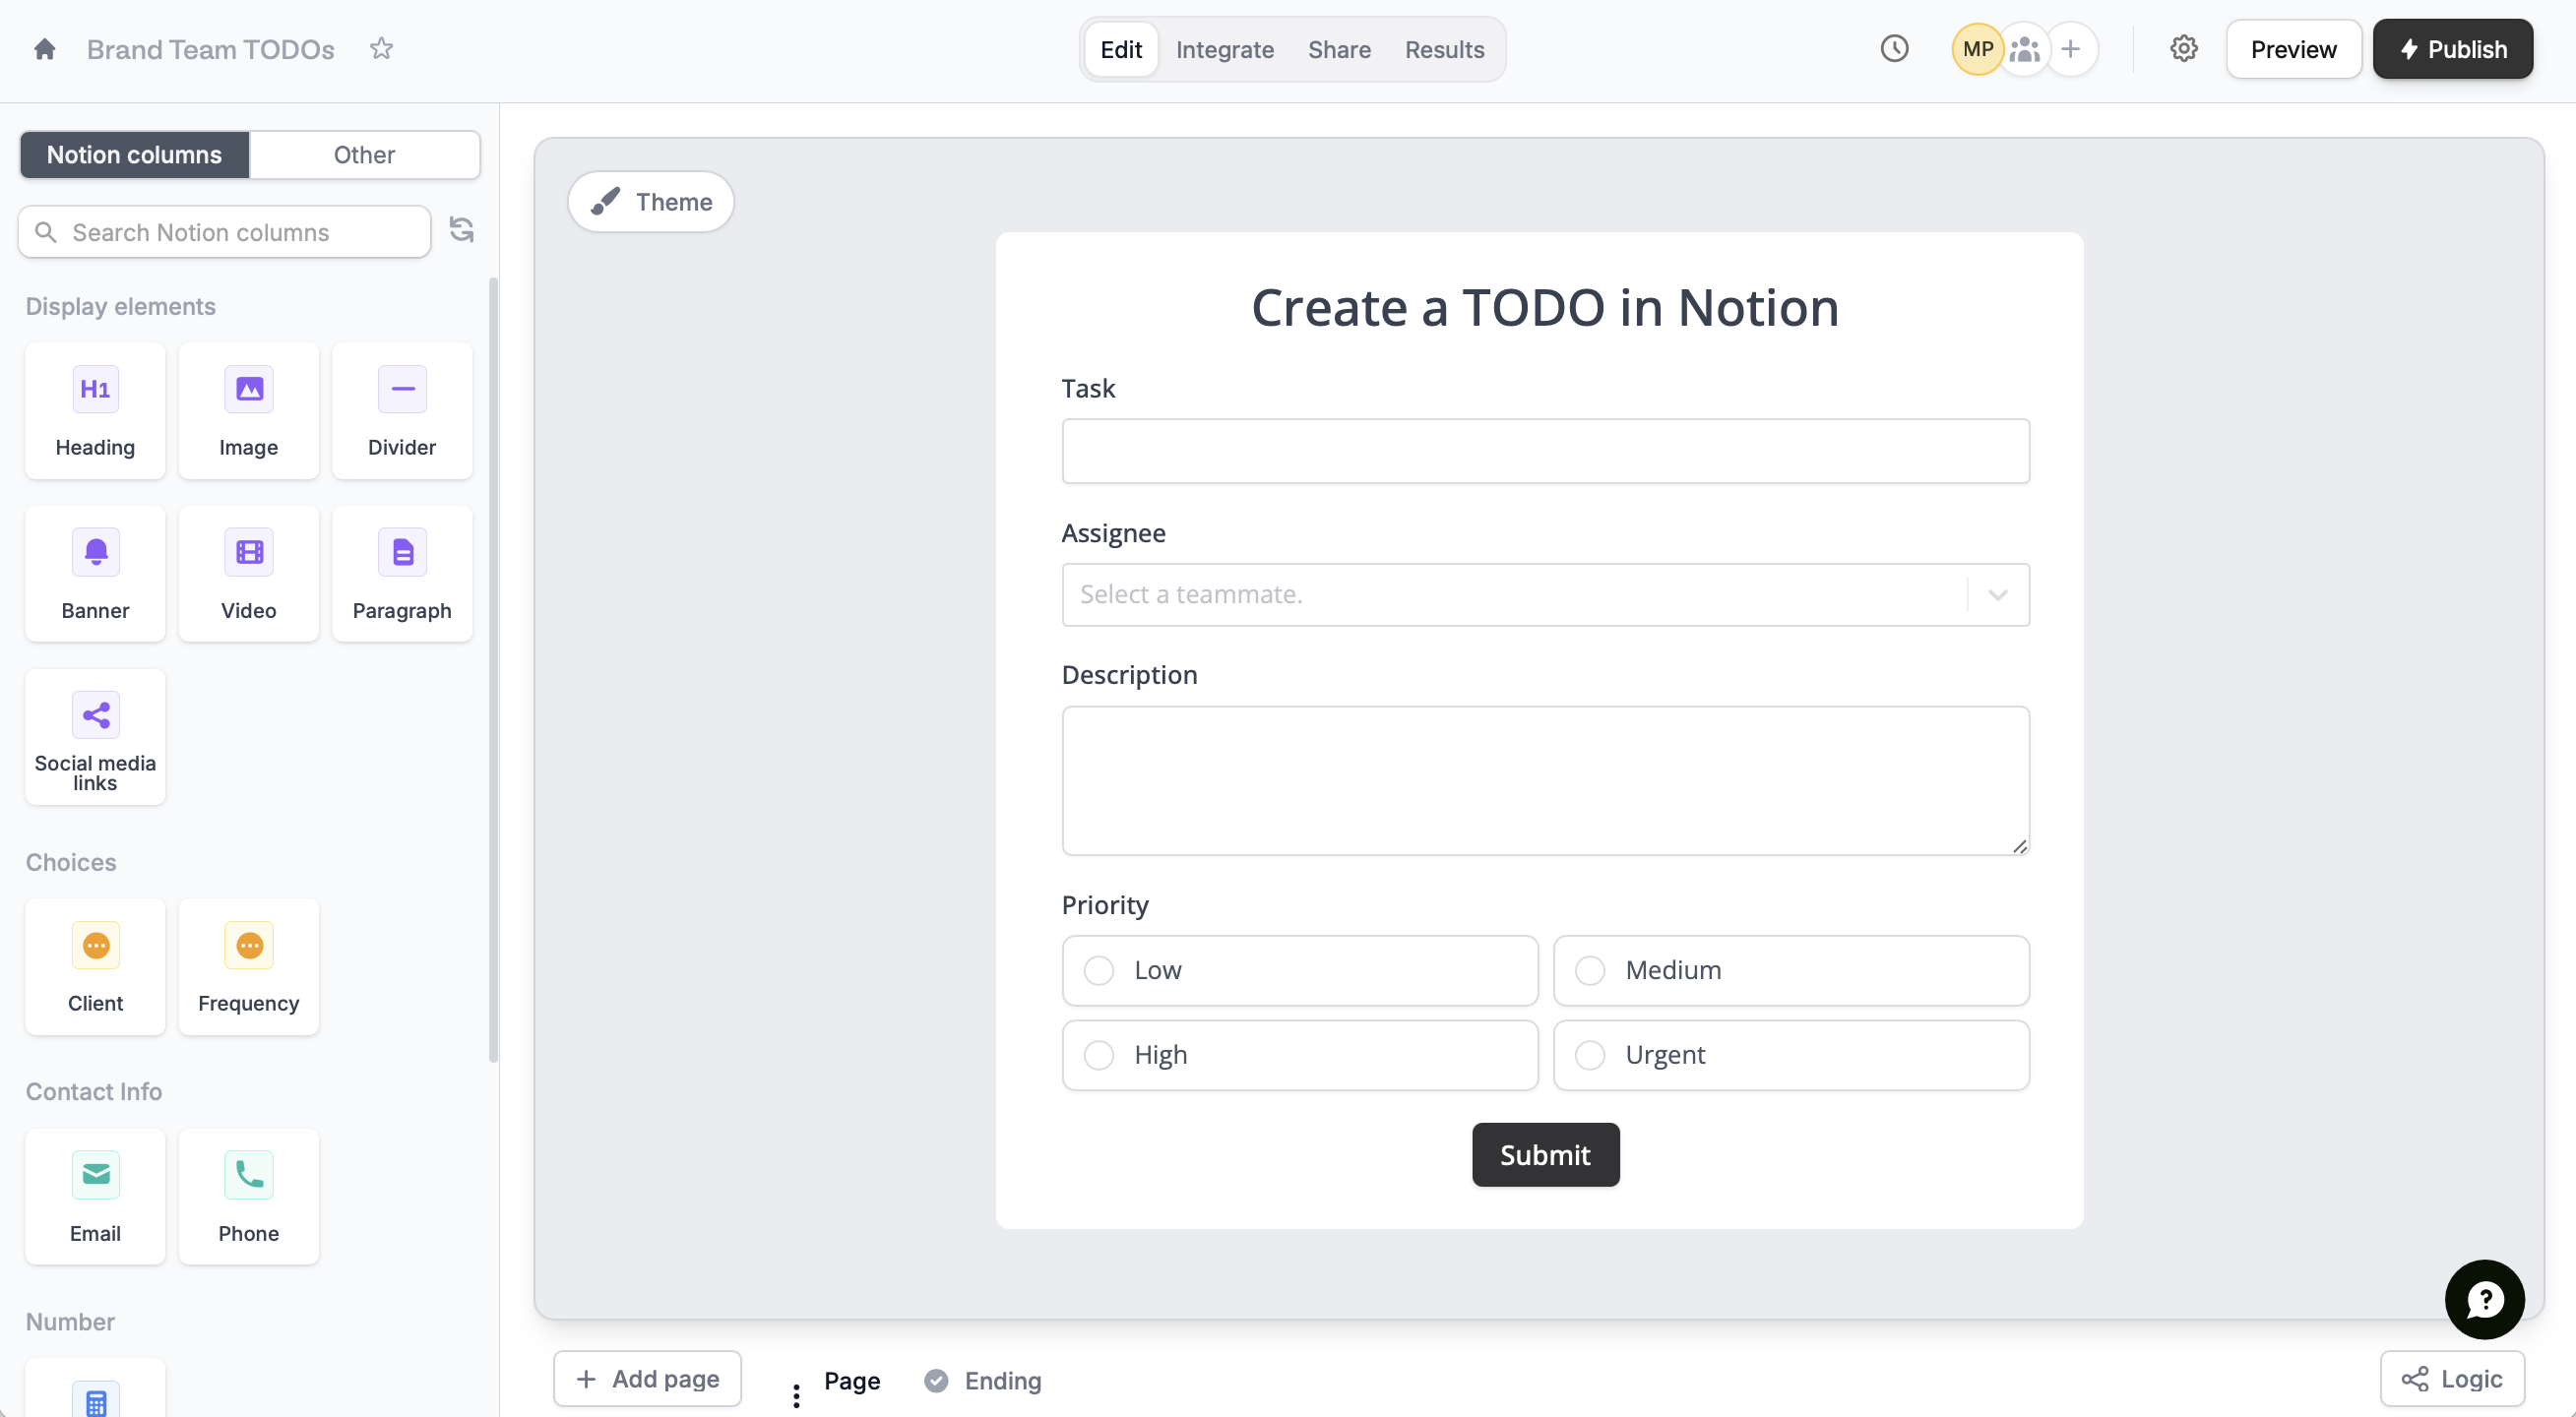 When someone fills out the form, their responses go straight into the matching row or field in the connected integration.
 ## How to map fields manually
Follow this if you made a Fillout form with fields before connecting to an integration, or if you want to map newly added fields after connecting to one.
If you haven't already, click `Integrate` from the top menu and connect your form to [Airtable](/airtable), [Notion](/notion), [HubSpot](/hubspot), or [other integrations](/integrations).
In **Mappings**, `+ Add new` integration field on the left and select the corresponding Fillout field on the right.
## How to map fields manually
Follow this if you made a Fillout form with fields before connecting to an integration, or if you want to map newly added fields after connecting to one.
If you haven't already, click `Integrate` from the top menu and connect your form to [Airtable](/airtable), [Notion](/notion), [HubSpot](/hubspot), or [other integrations](/integrations).
In **Mappings**, `+ Add new` integration field on the left and select the corresponding Fillout field on the right.
 **or Connect fields**
Click a field's to open the right-hand panel where you'll connect it to a column in your database or a field in your integration.
**or Connect fields**
Click a field's to open the right-hand panel where you'll connect it to a column in your database or a field in your integration.
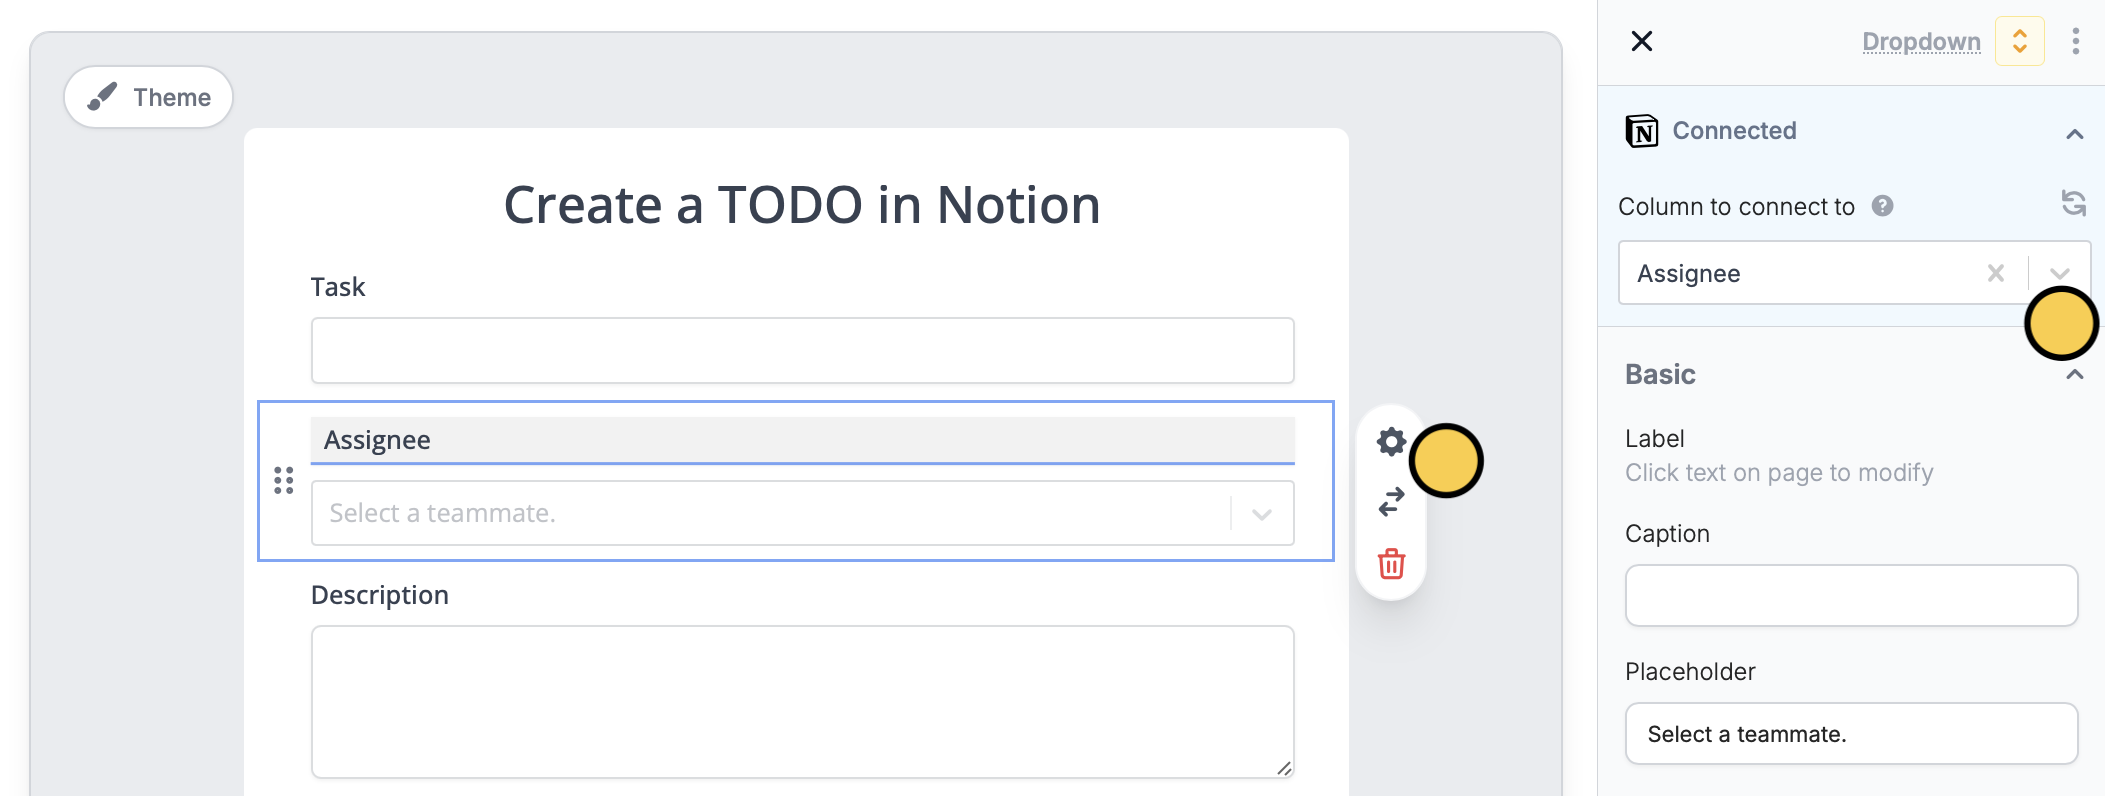 Once you've mapped the necessary fields, click `Publish` on the upper right corner, then share or embed your form.
## Updating fields and options
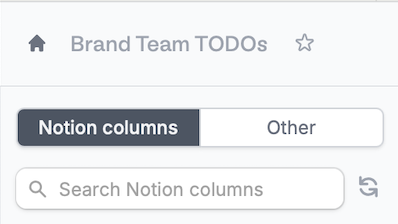
If you’ve edited connected fields, added or deleted options, added more fields, or made any changes to your integration, simply click to reflect the changes on Fillout.
**On the left-hand panel**
Once you've mapped the necessary fields, click `Publish` on the upper right corner, then share or embed your form.
## Updating fields and options
If you’ve edited connected fields, added or deleted options, added more fields, or made any changes to your integration, simply click to reflect the changes on Fillout.
**On the left-hand panel**
 **On the Integrate page**
 ## Other Mappings
You might want to send additional information to Airtable, Notion or other integrations when a respondent submits your form, other than your form fields. Fillout lets you map all of the ff:
* - [URL parameters](/url-parameters)
* - [calculations](https://www.fillout.com/help/calculations#pre-fill-fields-with-a-calculation)
* - [custom dates](/pre-fill-dates)
* - [enriched emails](https://www.fillout.com/help/lead-enrichment#how-to-enrich-emails) with company information
* - [static values](/integration-static-values) including [fields from a pre-fetched record](/pre-fetch-data)
* - [answers to another Fillout field](/answer-piping) including [respondent info from a login step](/login-page)
You can create a field, and [pre-fill](/prefill-fields) it with a value, then connect to your integration.
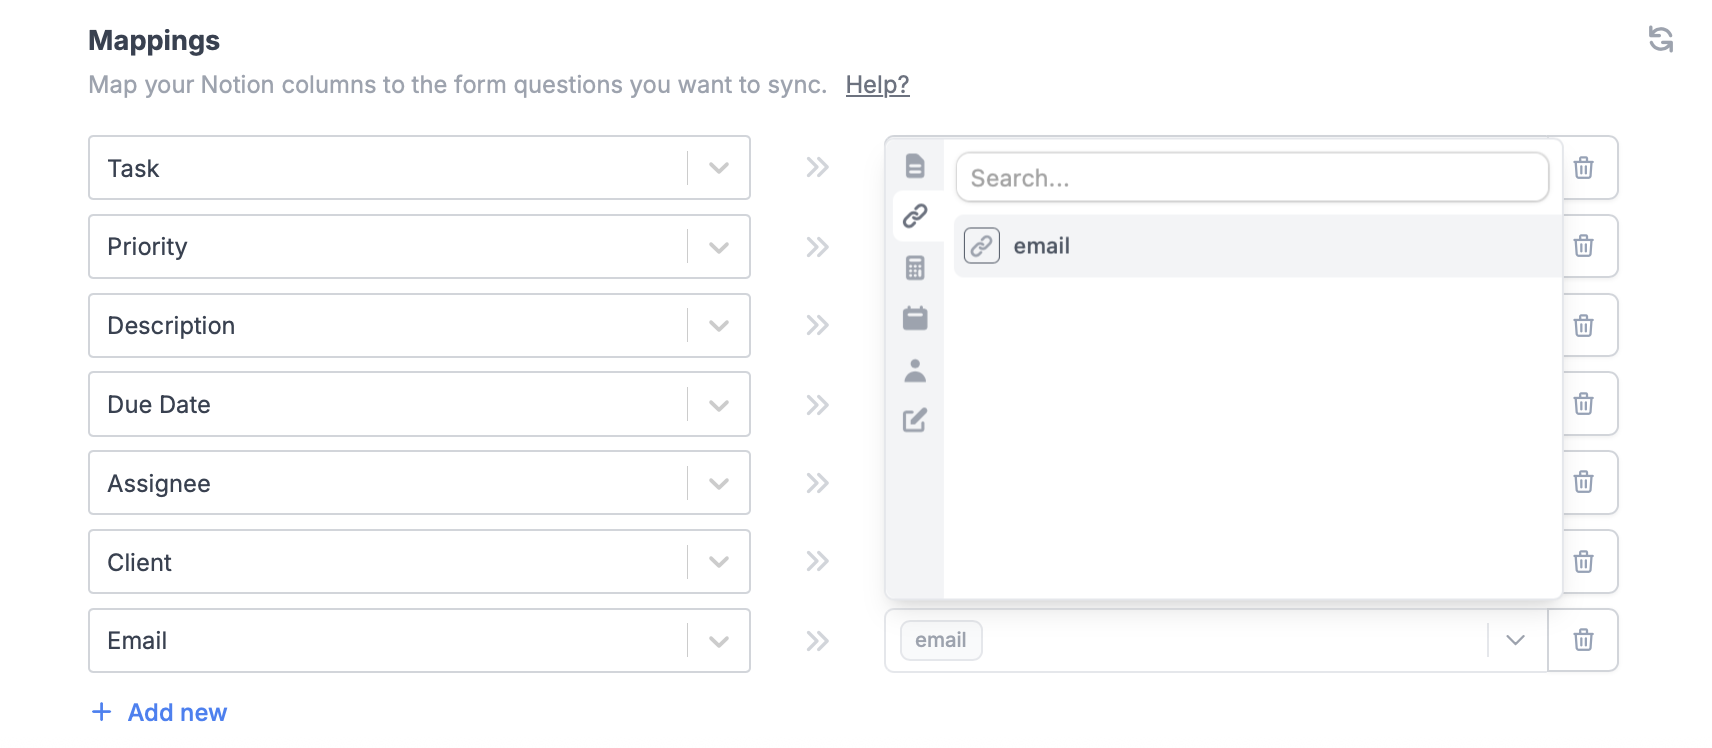
Click `Integrate` on the top menu and follow **step 2** above. For example, let's connect a URL parameter. We'll select the relevant Notion column on the left followed by the email parameter on the right.
## Other Mappings
You might want to send additional information to Airtable, Notion or other integrations when a respondent submits your form, other than your form fields. Fillout lets you map all of the ff:
* - [URL parameters](/url-parameters)
* - [calculations](https://www.fillout.com/help/calculations#pre-fill-fields-with-a-calculation)
* - [custom dates](/pre-fill-dates)
* - [enriched emails](https://www.fillout.com/help/lead-enrichment#how-to-enrich-emails) with company information
* - [static values](/integration-static-values) including [fields from a pre-fetched record](/pre-fetch-data)
* - [answers to another Fillout field](/answer-piping) including [respondent info from a login step](/login-page)
You can create a field, and [pre-fill](/prefill-fields) it with a value, then connect to your integration.
Click `Integrate` on the top menu and follow **step 2** above. For example, let's connect a URL parameter. We'll select the relevant Notion column on the left followed by the email parameter on the right.
 ## Related articles
Pre-populate fields based on previous inputs and more.
Require respondents to verify their email, key in a password, or use SSO.
Fetch info from a tool before your form loads.
## Related articles
Pre-populate fields based on previous inputs and more.
Require respondents to verify their email, key in a password, or use SSO.
Fetch info from a tool before your form loads.